


Drip, Tunnel, Pool: How Each Candle Type Is Actually Meant to Burn
If your candle is burning unevenly, the first question is not what went wrong. It is what kind of candle you are burning. A container candle is engineered to melt edge to edge, so candle tunnelling in a jar usually traces back to a short first burn, not a fault in the wax. A pillar candle is supposed to tunnel slightly, because the outer wall of wax is what stops it from dripping onto your table. And a handmade taper candlestick drips, the way dinner candles have dripped for centuries. Three candles, three burn behaviours, all three doing exactly what they were designed to do.
This is the part almost nobody explains. Container, pillar, and taper are not three shapes of the same product. They are three separate pieces of engineering, each balancing the same variables, wick size, wax blend, diameter, and exposure to air, toward a completely different goal. A container candle aims for a full liquid pool held safely inside glass. A pillar aims for a contained core burn inside a wall of its own wax. A taper aims for a tall, bright flame on a thin column that was never built to hold its own melt. Judge one type by the rules of another, and a perfectly healthy candle starts looking defective.
No candle brand in India has ever sat its buyers down and explained this, which is why "my candle is tunnelling" and "my candle is dripping" fill review sections across every marketplace. RAD LVNG makes all three types, hand-poured in natural soy wax with cotton wicks, and we would rather tell you exactly how each one behaves before you light it. This guide walks through each burn architecture, what counts as normal, what genuinely signals a problem, and how to rescue a jar candle that has already tunnelled. For the daily habits that stretch a candle's life, our candle care guide picks up where this one ends.
Why Do Container, Pillar, and Taper Candles Burn So Differently?
Because in each design, the melted wax has somewhere different to go. That single fact, where the liquid fuel sits while the candle burns, explains nearly every difference in behaviour between a jar candle, a pillar, and a taper.
Every candle is a small fuel system. The flame melts the wax beneath it, the cotton wick draws that liquid wax upward through capillary action, and the flame burns the fuel as vapour. The wick is the engine and the melt pool is the tank. What changes between candle types is the tank.
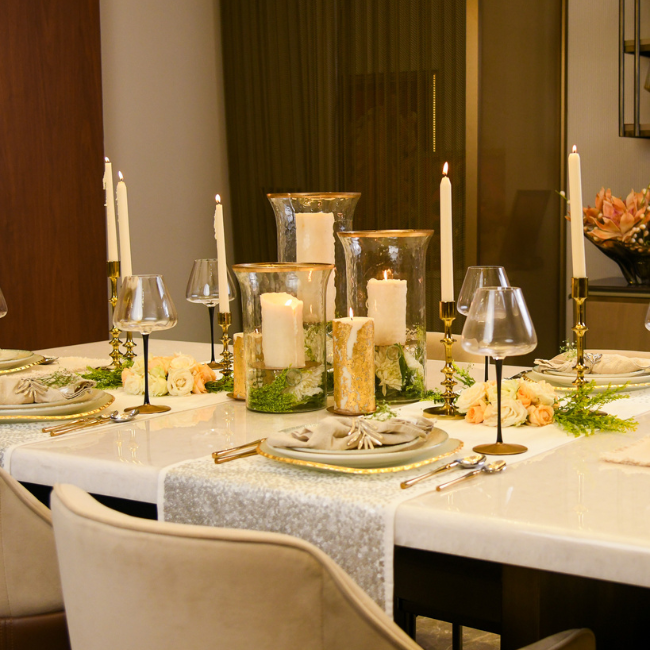
A container candle keeps its fuel in glass. Because the vessel holds everything, the candle can be designed to liquefy its entire surface, edge to edge, on every burn. That full, open pool is also what releases fragrance into the room, which is why container candles are the scent workhorses of the category.
A pillar candle is its own container. There is no glass, so the design leaves a wall of firm, unmelted wax standing around a molten core. The wall holds the fuel exactly the way a jar would. Melt that wall completely and the candle floods.
A taper holds almost nothing. It is a slim column with a shallow melt cup at the tip, burning fast and bright at eye level. Gravity manages whatever the cup cannot, which is where drips come from.
Wick size is the tuning knob across all three. A wide vessel needs a larger or doubled wick to push the melt pool out to the glass. A pillar needs a wick slightly undersized for its diameter so the wall survives. A taper needs a small, quick wick that keeps the flame tall and the cup shallow. None of this is visible on a shelf, which is why two candles that look similar can behave like entirely different objects once lit.
Why Is My Container Candle Tunnelling?
A container candle that tunnels is almost always reacting to how it was first burned, not to a flaw in the wax. Soy wax has burn memory. Whatever boundary your melt pool reaches on the first burn becomes the boundary it returns to on every burn after. Blow the candle out after forty minutes, while the pool is still a small circle around the wick, and the candle memorises that circle. From then on it burns downward inside it, leaving a thick wall of untouched wax stuck to the glass. That is tunnelling, and in a container candle it is the one burn behaviour that should not happen.
Should not, because container candles are the most precisely engineered of the three types. The wick is not a generic part. At RAD LVNG, wick size is tested and matched to each vessel's diameter, so the melt pool in a Candle Cafe jar reaches the glass within the first few hours and stops there, session after session, down to the bottom of the vessel. That pairing is what makes the burn hours honest, up to 17 hours for a 100g Petite, up to 35 for a 220g OG, and up to 45 for a 350g Grande. Get the wick-to-vessel match wrong at the factory and no amount of careful burning fixes it. Get it right, and the candle only needs three habits from you to burn clean to the end.
Give the first burn time. Light the candle when you have a free evening, not a free half hour. Let it burn until the entire surface is liquid, right up to the glass. That takes around two to three hours for smaller jars and three to four for larger ones. This single session sets the burn memory for the candle's whole life.
Trim the wick to about 6mm before every burn. A quarter inch, roughly the height of a grain of basmati standing on end. An untrimmed wick grows a carbon mushroom at the tip, which makes the flame tall, smoky, and hot enough to deepen the pool unevenly. Pinch off the burnt tip with a tissue or snip it once the wax is set.
Stop at three to four hours per session. Past that point the pool gets deeper than it needs to be, the glass runs hot, the wick starts to drift and mushroom, and fragrance burns off faster than it can diffuse. Put it out, let the surface set, and relight later. The candle gives you more total hours this way, not fewer.
If you are doing all three and a jar candle still tunnels by the third burn, the wick is undersized for the vessel. That is a genuine product fault, not user error, and worth taking back to whoever made it. The quieter habits that protect a container candle, where it sits, how you put it out, how you store it, are covered in 7 mistakes that are killing your scented candle.
Is My Pillar Candle Supposed to Tunnel?
Slightly, yes. A pillar candle that leaves a wall of unmelted wax around a sunken, glowing core is working exactly as designed. The wall is the pillar's container. With no glass around it, the only thing standing between molten wax and your table is that rim of firm wax, so the wick is deliberately sized a touch smaller than the candle's diameter. The flame burns a well down the centre, the wall stays standing, and the wax stays where it belongs.
This is the most misunderstood burn behaviour in the category. Buyers see a sunken centre and read it as the same tunnelling fault they have been warned about in jar candles. It is the opposite. In a jar, the glass does the containing, so the wax is free to melt fully. In a pillar, the wax must do its own containing. A pillar that melted edge to edge like a container candle would shed its sides in sheets. That is not a better burn, it is a flood.
What is normal: a melt well that deepens down the centre, an intact outer wall, and, on taller pillars lit in a dark room, that wall glowing from within like a lantern, which is half the reason the format exists. What is not normal: a one-sided burn that eats through the wall, which is almost always a draft pushing the flame sideways, a wick drowning so deep that it keeps going out, or molten wax repeatedly breaching the wall on a level, draft-free surface.
Two care rules cover nearly everything. First, always burn a pillar on a metal plate or coaster. Even a well-behaved pillar softens at its base over a long session, soy wax especially, and a plate protects wood, stone, and fabric while catching the rare breach. Second, keep it away from moving air. Ceiling fans, AC vents, and open windows bend the flame toward one side of the wall, and the wall loses. If a burn has gone lopsided, rotate the candle so the thicker side faces the flame's lean on the next session.
Pillars are the most sculptural candles RAD LVNG makes, forms first and flames second, from single columns to twisted candlesticks, all in the pillar candle collection. For choosing shapes and styling them in Indian rooms, ledges, consoles, dining tables, the pillar candle guide for Indian homes goes deep on placement.
Why Is My Taper Candle Dripping?
Because handmade taper candles drip. That is the design truth, and it is better said plainly than discovered at a dinner table. A taper is a slim column of wax with a shallow melt cup at the burning tip. The flame is fast and bright, and whenever the cup fills quicker than the flame can consume the fuel, the surplus spills over the rim and runs down the column, cooling into the wax trails that have marked candlesticks for as long as dinner candles have existed. Moving air speeds this up, because a flickering flame melts unevenly and tips the cup.
The reason this surprises modern buyers is that a different product exists and has quietly set the expectation. Machine-made "dripless" tapers are extruded from paraffin under pressure to a very high density, with the wick and wax tuned so the flame consumes nearly everything the cup melts. They are efficient, uniform, and made by machines in their millions. A handmade taper in natural soy wax is a different object, softer, slower to make, with a lower melting point and the slight irregularities of a thing shaped by hand. The two are not better and worse versions of each other. They are different products that happen to share a silhouette.
So choose with clear eyes. If you want a candle that never drips, a taper is not your format, and a jar candle or a pillar on a plate will serve you better. If you want the classic dinner-table ritual, flames at eye level, light moving across glasses and faces, wax recording the evening down the side of the candlestick, this is exactly that. The drips come with it.
Three care habits keep the drips where they belong. Always pair a taper with a holder that has a drip plate. A proper candlestick or stand does two jobs, holding the taper dead vertical and catching what runs down. The candle stands and holders collection is built for exactly this. Keep tapers out of moving air. A draft is the difference between an occasional drip and a steady one, and it also makes the taper burn down one side. Seat it firmly and straight. A tilted taper drips constantly on its low side. If the taper is loose in its holder, a small ring of softened wax at the base fixes the wobble.
Cleanup is easier than it looks. Let spilled wax cool completely, then peel or pop it off metal and glass. Ten minutes in the freezer makes stubborn wax release from a holder almost intact.
How Do You Fix a Container Candle That Has Tunnelled?
A tunnelled jar candle can usually be rescued with heat and patience. The goal is to melt the raised wall of leftover wax so the surface levels out, then give the candle one proper full-pool burn to reset its memory. Two methods work, one lit and one unlit.
The foil method. Wrap a sheet of aluminium foil around the top of the jar and fold it inward into a loose dome, leaving an opening of two to three centimetres above the flame so it can breathe. Light the candle and leave it for one to two hours. The foil reflects heat back across the surface and melts the wall that the flame could not reach on its own. Your candle will spend the evening looking like it is wearing a tiny space helmet. Let it. When the surface is liquid edge to edge, remove the foil carefully, it will be hot, and let the candle finish a normal session.
The hair dryer reset. With the candle unlit, aim a hair dryer at the surface on medium heat until the high wall softens and levels into the centre. Let the surface set smooth overnight. The next time you light it, treat it as a brand new first burn and let the pool reach the glass before putting it out.
If the tunnel is deep enough that the wick keeps drowning, deal with the excess liquid first. While the wax is melted, pour a little off onto a sheet of paper, never into a sink, or soak it up with a folded tissue held at the edge of the pool until the wick stands clear.
A rescued candle burns honestly again, but rescue costs you wax that prevention would have saved. The first burn rule does more for a container candle than every fix combined.
Quick Reference: How Each Candle Type Is Meant to Burn
The short version, for saving or screenshotting.
| Candle type | How it burns | What is normal | What is not | Care rule |
|---|---|---|---|---|
| Container (jar) | Full melt pool, edge to edge, burning down evenly inside the glass | A fully liquid surface within 2 to 4 hours of lighting | Tunnelling, a thick wall of wax left on the glass despite proper first burns | First burn to the edges, trim wick to 6mm, stop at 3 to 4 hours |
| Pillar | Burns a core down the centre, outer wall stays standing | A sunken, glowing centre inside an intact wax wall | Wax repeatedly breaching the wall on a level, draft-free surface | Always on a metal plate or coaster, away from moving air |
| Taper (candlestick) | Tall, fast flame on a thin column with a shallow melt cup | Drips running down the side, more in moving air | Constant guttering, heavy leaning, or burning down one side only | Holder with a drip plate, seated straight, away from fans and AC |
What Goes Into a Candle That Burns the Way It Should?
Burn behaviour is decided on the pouring table, long before the first match. Every RAD LVNG candle, across all three architectures, is hand-poured in imported certified natural soy wax with cotton wicks. Soy burns cooler and cleaner than paraffin, no black soot on the rim, and that cooler flame is part of why the melt pool spreads evenly instead of boring straight down.
The wick work matters just as much. Each vessel diameter and pillar form gets its own tested wick size, because the same wick that pools a small jar perfectly will tunnel a large one and flood a pillar. This is slow, unglamorous testing, and it is the difference between a candle that behaves and a candle that needs constant supervision.
Fragrance is its own discipline. RAD LVNG candles carry perfumery grade fragrance oils, infused with essential oils, at about 1.5x the fragrance load of standard market candles. Worth knowing: fragrance load shapes how a room smells, not how a candle burns. A heavily fragranced candle still tunnels if its first burn is cut short. What does connect the two is cure time. Every candle rests for 4 to 7 days before shipping so the fragrance binds fully into the wax, which is why the scent holds steady from the first burn to the last instead of fading after the opening hour.
How all of this translates into choosing the right candle for your room size, scent family, and season is the subject of our complete guide to scented candles for Indian homes.
Frequently Asked Questions
Why is my candle tunnelling?
If it is a container candle, the most common cause is a short first burn. Soy wax has burn memory, and a pool that never reached the glass on burn one keeps returning to the same small circle. Let the surface melt fully edge to edge, 2 to 4 hours, on the first lighting. If it is a pillar candle, slight tunnelling is the design, the outer wall is what prevents drips.
Is it normal for a taper candle to drip?
Yes. Handmade tapers in natural wax drip when the small melt cup at the tip overflows, exactly as dinner candles have for centuries. Machine-made dripless tapers are a different product, extruded from high-density paraffin. Burn handmade tapers in a holder with a drip plate, seated straight, away from fans and AC, and the dripping stays modest and manageable.
How long should I burn a candle the first time?
Until the melt pool reaches the edge of the vessel. That takes roughly 2 to 3 hours for a 100g jar and 3 to 4 hours for larger sizes. This first session sets the burn memory for every burn after it, so light it when you have the time to see it through. Cap any single session at 4 hours.
How do I fix a candle that has already tunnelled?
Wrap foil around the top of the jar, domed inward with a small opening above the flame, and burn for 1 to 2 hours. The reflected heat melts the leftover wall and levels the surface. Alternatively, level the surface with a hair dryer while unlit, let it set, then give the candle a proper full-pool burn to reset its memory.
Which candle type should I start with if I am new to candles?
A container candle. The glass manages the melt pool for you, the burn is the most forgiving of the three types, and the fragrance payoff is the strongest. The full RAD LVNG range, container jars, sculptural pillars, and handmade tapers, lives in the candles collection, all in natural soy wax with cotton wicks.